How to Achieve Your Vision Through Effective Photo Editing
Photography is more than just pressing a shutter button. Every image tells a unique story, and photo editing plays a crucial role in conveying the essence of that story. Whether you’re capturing a moment to share with others or printing it to display, editing helps bring your vision to life. In this post, we’ll explore how to define your vision for a photograph, the tools and techniques you can use to edit, and walk through a detailed example of editing in Lightroom.
Understanding the Power of Vision in Photography
Before you dive into editing, it’s important to understand the role vision plays in photography. Good photos capture what you find meaningful, while bad ones miss that mark, regardless of how much editing you apply afterward. The creative process begins before you even lift your camera. When you see something that catches your attention—whether it’s a beautiful landscape or a unique moment—you form a vision of how you want that image to look once captured.
The question that drives this process is simple: Why? Why are you taking this photo? Why does this scene matter to you? From the choice of lens to composition and editing, answering this question will guide you toward achieving the result you envision.
1. Define Your Why
Ask yourself: Why did I take out my camera in the first place? What caught my attention? This is your subject. Understanding your subject and why it’s important will help you shape the rest of your creative decisions.
2. Master Composition
Composition is vital to guiding your viewer’s eye to the subject. Consider the use of light and framing. Does the subject stand out clearly? Think about how you can use elements like lines, shapes, and contrast to draw attention to the most important parts of the scene.
3. Know Your Gear
Knowing how to use your camera gear effectively can make all the difference in capturing a successful photo. Understand your camera’s settings, buttons, and options so you can make quick adjustments and capture the look you want in the moment.
Achieving Your Vision Through Editing
Once you’ve captured your image, it’s time to edit. Editing is a powerful tool that allows you to refine and perfect your vision. But before you start, it’s important to prepare yourself and your gear.
The Right Gear for the Job
When preparing to edit, think about your goals. Are you editing a photo for social media or a large print for your wall? The tools you use might vary depending on your end goal. For instance, if you’re planning to print your image in a large format, ensure your monitor is color-calibrated to match the colors in your photo lab’s prints. This helps ensure that what you see on-screen matches what you’ll receive in print.
Regularly calibrating your monitor with a device like the X-Rite i1 Pro is essential for accurate color representation. Doing this monthly can prevent discrepancies between your screen and print colors.
Speed Up Your Workflow with the Right Tools
If you’re editing often, using the right tools can make the process much more efficient. A graphic tablet and stylus, for example, can offer a more intuitive and precise editing experience compared to using a mouse. With a tablet, you can navigate through your edits with greater accuracy, which can be especially helpful for detailed adjustments.
Revisit Your Vision Before Editing
Before you dive into editing, revisit your “why.” Think about what you want to communicate through the photo. What is the message you want to send? What story are you trying to tell? These questions should guide your editing process. Consider the subject, mood, and the emotions you want to evoke.
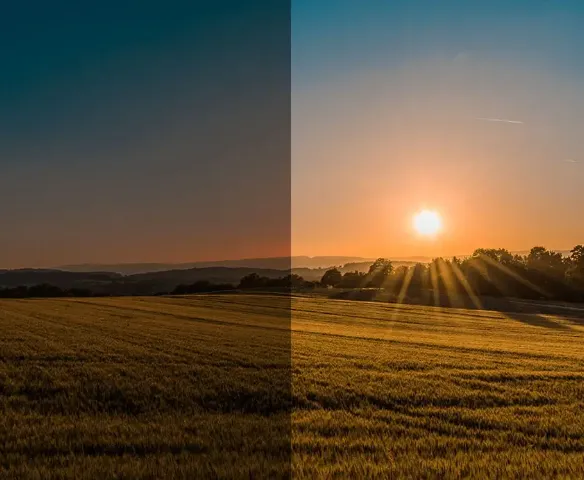
Start with the Big Adjustments
When editing, start by making large adjustments first, like exposure, contrast, and color balance. These broader changes set the foundation for finer tweaks later. Be mindful that altering one setting may affect others, so keep an eye on the overall balance.
Once the basic adjustments are in place, focus on refining details. Use sliders for highlights, shadows, and clarity to bring out specific elements of the photo.
Example: Editing a Landscape in Lightroom
Let’s walk through an example to see how this process works in action.
I captured an image at Mesa Arch in Moab, hoping to convey the vibrant sunrise over the arch. The composition was good, but the raw image felt a bit flat. To start, I applied a lens correction to remove vignetting and distortion from the wide-angle lens.
Next, I worked on enhancing contrast. I adjusted the tone curve to create more depth by darkening the shadows and brightening the highlights. This created a sense of dimension in the image. Then, I fine-tuned the shadows and highlights sliders to bring more detail into the bright and dark areas of the photo.
After that, I used the Dehaze slider to reduce the atmospheric haze and improve clarity. I followed up with clarity and texture adjustments to highlight the details in the snow and rocks.
For color, I boosted the vibrancy to enhance the scene’s natural colors, especially the reds and oranges of the sunrise. Finally, I sharpened the image and reduced noise to finalize the details.
The result is an image that truly captures the stunning sunrise at Mesa Arch, reflecting the vision I had when I first took the photo.
Conclusion
Effective photo editing is not just about using the right tools; it’s about starting with a clear vision of what you want to communicate. By defining your subject and story, understanding your gear, and using editing techniques thoughtfully, you can bring your creative vision to life. Whether you’re editing a photo for personal use or preparing a print, these steps will help you achieve the image you envisioned from the start.