Light painting is a captivating technique that allows you to creatively illuminate subjects in a dark setting using a light source. While commonly used for night photography, experimenting with light painting can enhance your understanding of how light interacts with your subjects, improving your overall photographic skills. Whether you’re shooting during the day or at night, mastering this technique will help you control lighting and add depth to your images.
What is Light Painting?
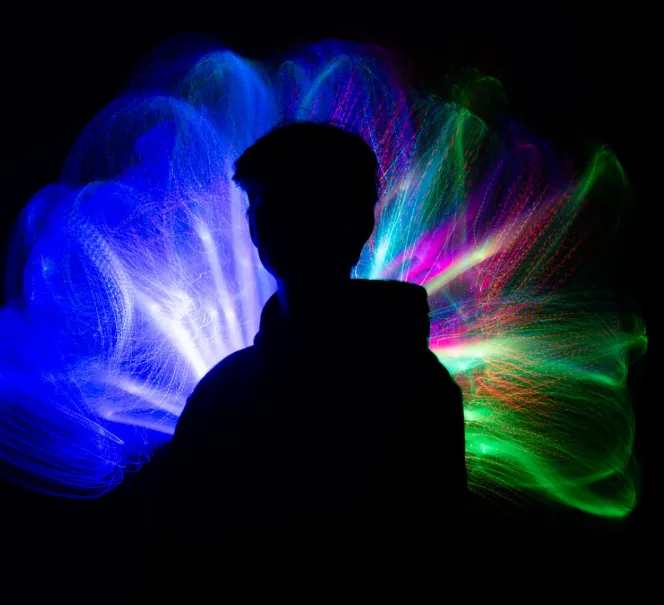
Light painting is exactly what it sounds like: creating art with light. Instead of using traditional paint, you use light to “paint” your subject, capturing it on camera. It’s a fun and creative way to experiment with lighting and explore how light can define your subject. You can use various light sources, such as flashlights or LED lights, to illuminate your subject in the dark.
For example, imagine capturing a stone arch at night. The first image, lit only by moonlight, captures the scene with minimal detail. But by adding a light source to highlight the textures of the rock, you can create a more dynamic and visually engaging photograph. That’s light painting in action.
Why Experiment with Light Painting?
If you’re already comfortable with your camera settings, light painting is a great way to challenge yourself and improve your skills. Similar to black-and-white photography, which helps you better understand contrast, light painting allows you to see how light affects the depth and mood of your image. By experimenting with light sources and different directions, you’ll gain a deeper understanding of how lighting can shape your photos, whether at night or during the day.
How to Get Started with Light Painting
To get started with light painting, you don’t need to go far. A dark space or an area that’s not too well-lit will work perfectly. For this example, I chose a local dog park near my home where I found three trees to use as subjects for my experiments. Let’s dive into how you can set up and experiment with light painting.
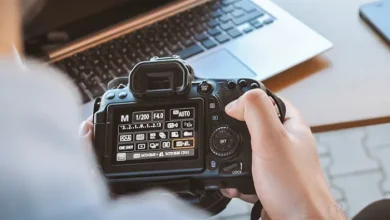
Basic Setup and Camera Settings
- Camera Mode: Manual
- ISO: 100
- Aperture: f/8
- Shutter Speed: 30 seconds
- Tripod: Essential for stability
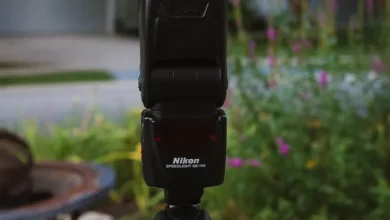
- Light Source: Flashlight or any portable light (I used a Lume Cube)
Before starting, ensure your camera is focused. You can use a light to illuminate the subject and focus the camera either manually or by using autofocus and then switching to manual focus to lock it.
Experiment #1: Static Light Source
In the first experiment, I used a fixed light source to illuminate the trees. The light stayed in one position while the camera took a 30-second exposure. Here’s how I positioned the light:
- Position #1 – Light on the Camera
Placing the light directly on the camera created a flat, uninteresting look with no depth. This is similar to how flash works on selfies—everything is evenly lit but lacks contrast. - Position #2 – Light to the Right of the Camera
Moving the light 90 degrees to the right introduced more texture and depth, with one tree brighter than the others. The light fall-off was noticeable, demonstrating the inverse-square law, which states that the intensity of light decreases with distance. - Position #3 – Light Behind the Subject
A backlight created silhouettes and lost detail in the trees, similar to photographing someone in front of a window during the day. The light source should be blocked from hitting the camera to avoid lens flare and preserve the scene. - Position #4 – Light to the Left of the Camera
Similar to the right side, lighting from the left created a more balanced composition with slight variations in brightness on the trees.
Combining the Shots
One of the best aspects of light painting is that you can combine multiple shots to create the perfect image. By blending the results from different light positions, you can craft a composition that best suits your vision.
Experiment #2: Light Sweep
For the second experiment, I moved the light source in a sweeping motion across the scene. This technique allows you to create more dynamic light patterns and adds variation to the lighting.
- Position #1 – Sweep from the Camera
Sweeping the light from the camera position illuminated the foreground, adding contrast and texture. - Position #2 – Sweep from 45 Degrees to the Right
This position highlighted the right side of the scene, but the light wasn’t as even as I hoped. It created darker sections, adding variety to the shot. - Position #3 – Sweep from Behind the Subject
Lighting from behind the trees added depth and highlighted the slopes of the landscape. This made the scene feel more three-dimensional. - Position #4 – Sweep from 45 Degrees to the Left
Adding light from the left further filled in the shadows and highlighted parts of the tree trunks, helping them stand out from the darkness. - Position #5 – Sweep from Left of the Camera
The final sweep illuminated the remaining dark areas, filling out the image and balancing the light distribution.
Final Composite Image
After completing the sweeps, I combined all the shots into a single composite in Photoshop. By adding extra lighting to individual trees, I was able to make them stand out even more. This step shows the power of light painting—each shot, whether static or swept, can be blended to create a final image that wouldn’t be possible in a single exposure.
Conclusion
Light painting is an excellent way to push your creativity and learn more about the relationship between light and your subjects. Whether you’re working with a static light source or sweeping the light across your scene, the possibilities are endless. It’s a technique that helps you understand how to use light to enhance depth, contrast, and texture in your photos.
The key takeaway is that experimenting with light painting will help you gain more control over your lighting, improving your overall photography skills. So grab a flashlight, set up your camera, and start painting with light!