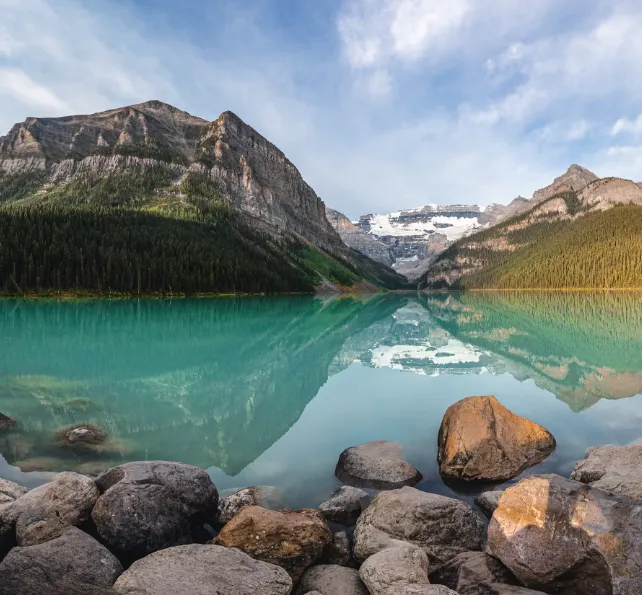
How to Capture and Stitch Stunning Panorama Images
Capturing panoramic images can be a thrilling challenge, but with the right techniques and a bit of practice, you can create breathtaking wide-angle shots. This guide will provide you with essential tips for taking the right photos, common issues to avoid, and the best software for stitching them together seamlessly. Let’s dive in!
1. Take Enough Photos with Overlap
When capturing a panorama, one of the most important things is ensuring you take enough photos, with a significant overlap between each frame. The more overlap you have, the easier it will be for stitching software to merge the images correctly. If you don’t capture enough overlap, the software might fail to align the images properly, leaving you with incomplete or misaligned panoramas. It’s always better to take too many photos than too few, and you can always leave some out later.
2. Shoot Vertically
For wider panoramas, shooting vertically (portrait mode) is often the best approach. This allows you to maximize the height of your final image, making the most of your camera’s sensor. For example, if you shoot horizontally, your final panorama might only be a fraction of the size that it would be if you shot vertically. The extra height captured in a vertical shot results in a much larger and more detailed final image.
3. Keep the Camera Level
One of the most crucial factors in successful panorama photography is ensuring your camera stays level as you rotate it. If the camera tilts up or down, the horizon in each frame will shift, making it difficult for stitching software to merge the images correctly. Using a tripod with a level base is essential for consistent and accurate framing. For even more precision, you can invest in specialized panoramic tools like a panning base or an L-bracket.
4. Maintain Consistent Exposure and White Balance
When shooting for panoramas, make sure your exposure and white balance settings are consistent across all images. Use manual mode to lock in these settings, as any changes from one shot to the next can lead to mismatched images. If you plan to create an HDR panorama, you’ll need to bracket your exposures, but for regular panoramas, consistency is key to ensure smooth blending between frames.
5. Focus on Composition
Even though you’re capturing a wide scene, composition still matters. Pay attention to the subject and balance within the frame. Avoid overwhelming the viewer with too much empty space, and ensure there’s a focal point or interesting subject that leads the viewer’s eye through the image. A well-composed panorama not only looks better but also adds a sense of purpose to your wide-angle shots.
6. Using Video to Create a Panorama
Did you know that you can create panoramas from video footage? Using tools like Luminar Neo, you can extract frames from a video and stitch them together to form a panorama. When filming, keep your movement slow and steady to avoid blurry sections in the final image. Make sure the horizon stays steady and doesn’t shift during the video, as this will help the stitching software create a sharper, more detailed result.
Common Panorama Pitfalls
There are a few issues you may run into when shooting and stitching panoramas. Here are some things to watch out for:
- Distortion: Avoid using wide-angle lenses for panoramas, as they can cause distortion, particularly at the edges of the frames. Opt for a focal length of around 35mm or longer for the best results.
- Gaps or Missing Information: Always capture more images than you think you need. Missing parts of the scene can ruin the panorama and may be impossible to fix later.
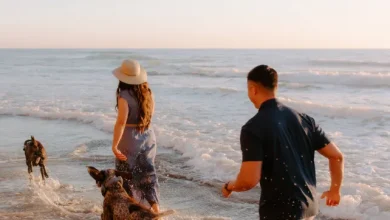
- Parallax Issues: When shooting panoramas of subjects close to you, such as people or objects, parallax errors can occur, where foreground and background elements don’t align properly. To avoid this, focus on landscapes or distant subjects for your panoramic shots.
Stitching Your Panorama
Once you’ve captured your images, it’s time to stitch them together. There are various software options available for panorama stitching, each with its pros and cons:
- Luminar Neo: Offers easy panorama stitching with advanced features like multi-row stitching and video-to-panorama capabilities.
- Lightroom Classic and Photoshop: Both have solid panorama stitching features, though Luminar Neo has emerged as a top contender for speed and ease of use.
- Affinity Photo and GIMP: Both are solid alternatives, with GIMP being free, though they might require a bit more manual work compared to dedicated panorama software.
Other options include Capture One, ON1 Photo Raw, and PTGui, which have specialized features for advanced users.
Final Thoughts
Panorama photography can seem daunting at first, but by following these tips and avoiding common pitfalls, you’ll be able to create stunning wide-angle images. Remember, the key to a successful panorama is preparation, consistency, and patience. Once you’ve captured your images, choose the best software to stitch them together, and you’ll have a beautiful panoramic photo in no time.