Smoke photography offers a fantastic way to experiment with your creativity, especially when you’re stuck indoors or want to try something new without needing to venture outside. Whether you’re indoors on a rainy day or simply feeling like staying home, capturing the ethereal beauty of smoke can turn into a highly rewarding project. Here’s a simple guide to get you started on creating stunning smoke photography.
What You’ll Need
The good news is, you don’t need a lot of fancy equipment to get started. Here’s what you’ll need:
- A camera with manual mode
- A lens (any lens will work, but adjust your distance for the composition)
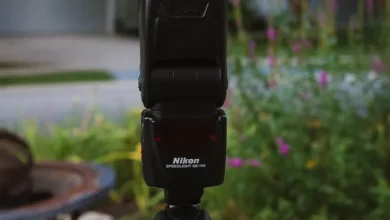
- A speedlight (flash)
- A wireless trigger or use your camera’s two-second timer
- A tripod (ideally two for stability)
- A black or dark backdrop
- A closed, dimly lit room
- Incense sticks or any smoke source like candles or matches
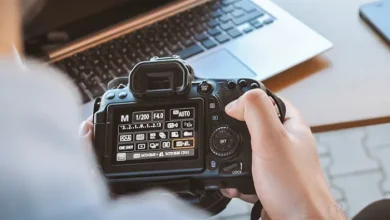
Camera Settings
For smoke photography, you’ll want to shoot in manual mode. Here are some basic settings to get you started, but feel free to adjust depending on your specific scene:
- Aperture: f/8 or f/11
- Shutter speed: 1/250th or 1/200th (if you’re unsure, use 1/200th)
- ISO: 200
Once you have your camera set, you can start adjusting based on your results. Always review your test shots, check the histogram, and make small adjustments as needed.
Flash Setup
Position your flash at a 90-degree angle to the camera and set it to manual mode. Start with half-power (1:2 or 1/2). If the flash is too bright, lower the power to 1/8 or 1/16. To prevent the flash from spilling onto your backdrop, you can use small pieces of paper or cardboard to block stray light. This helps focus the light solely on the smoke, allowing for a cleaner composition.
Make sure the flash is directed slightly downward and close to the smoke. This setup will highlight the smoke without creating unwanted lens flare.
Tripod and Focus
A tripod is essential for smoke photography. Since the smoke is constantly moving, using a tripod ensures that your camera remains steady and doesn’t need constant adjustments for focus. Begin by focusing on the end of your incense stick using autofocus. Once focused, switch to manual focus to prevent the camera from refocusing between shots.
Setting Up the Backdrop
For the best results, use a black or dark backdrop. This will make the smoke stand out sharply and create a clean, dramatic look. If you don’t have a black backdrop, a dark-colored bed sheet or reflector can work too. Place the backdrop about a meter (3 feet) behind the incense, ensuring it completely fills the viewfinder.
Make sure no light from the flash or ambient light spills onto the backdrop, as this can affect the clarity of your smoke images.
Using Incense for Smoke
Incense sticks are ideal for generating smoke because they burn slowly and create beautiful trails. Choose incense that you enjoy the smell of, and keep the room free of any drafts. You want full control over the movement of the smoke, so make sure to close windows and turn off any fans. You can use one incense stick or several, depending on the look you’re aiming for.
Taking Your First Shots
Start by taking a shot without the flash to ensure that your frame is completely black. If you see any light in the room, adjust the ISO or aperture to darken the image. Once you’ve achieved a black frame, light the incense stick and wait for the smoke to begin rising.
Initially, the smoke will likely move in a straight line, which can look a bit plain. This is where your creativity comes into play! Move your hand through the smoke in different directions—left to right, right to left, or even swirl your hand above it. Each movement will create unique and dynamic patterns in the smoke. You’ll soon notice that every shot is different, giving you endless creative possibilities.
Safety Tips
While smoke photography is fun, it’s important to keep safety in mind:
- Ensure proper ventilation by keeping a door open to avoid the smoke building up in the room, which can be harmful to your health.
- Be cautious with fire, especially when using incense or other smoke-producing sources. Always keep an eye on the flames to prevent accidents.
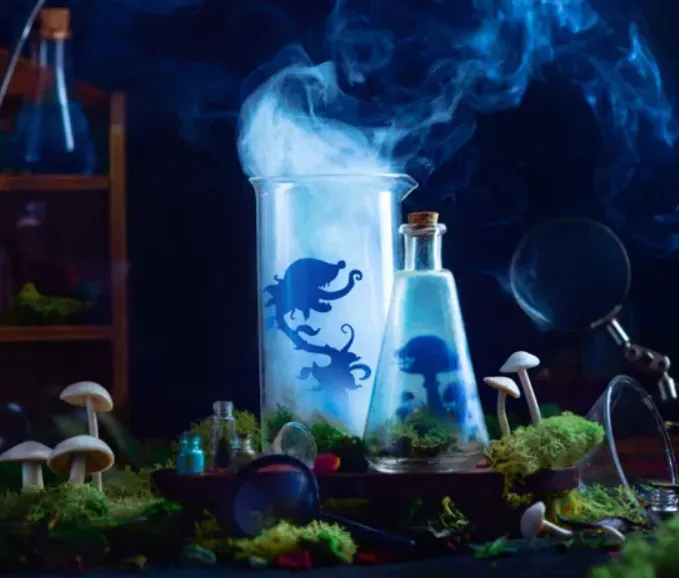
Getting Creative with Post-Processing
Once you’ve captured some amazing smoke shots, you can get even more creative in post-processing. Using tools like Photoshop or Lightroom, you can adjust the color and tone of the smoke to add a unique touch. Split toning, in particular, is great for giving the smoke an ethereal, dreamlike quality.
You can also experiment with multiple incense sticks burning at the same time to create denser or more intricate smoke patterns. Or, try including props like action figures or other objects interacting with the smoke to add an extra layer of interest to your composition.
Conclusion
Smoke photography is a fun and rewarding way to explore creative techniques right from the comfort of your own home. With just a few simple tools, some patience, and a little experimentation, you can capture striking, unique images. Whether you’re focusing on light manipulation, smoke patterns, or post-processing, the possibilities are endless. Try it out and let your imagination run wild!