6 Essential Tips for Sharper Photos Every Time
Capturing sharp, crisp images can be a challenge for many photographers, especially beginners. But with the right camera settings and techniques, you can drastically improve the sharpness of your photos. Whether you’re taking portraits, landscapes, or action shots, these essential tips will help you get the sharpest photos possible.
1. Select the Right Focus Mode
Your camera’s focus mode plays a crucial role in ensuring sharp photos. There are several focus modes to choose from, and understanding when to use each is key:
- Single Focus Mode: Ideal for stationary subjects. The camera locks focus when you press the shutter button halfway down. This is great for portraits or still-life photography where your subject isn’t moving.
- Continuous Focus Mode: Perfect for moving subjects. This mode continuously adjusts focus as your subject moves, making it a great option for sports or photographing animals.
- Auto Focus Mode: This mode automatically switches between single and continuous focus based on the subject’s movement. While convenient, it’s not always reliable, especially in fast-paced environments.
- Manual Focus: This is usually the last resort and is best used in specific situations like macro or night photography. You manually adjust the focus ring to get the sharpest image.
For most situations, selecting either Single Focus or Continuous Focus based on your subject’s movement will give you the best results.
2. Choose the Right Focus Point
Most cameras allow you to select focus points in the viewfinder. The key to achieving sharp images is choosing the right focus point:
- Single Focus Point: This is your best option for stationary subjects, especially when using a large aperture with a shallow depth of field. By focusing on a specific point, you ensure that your subject is sharp and clear.
- Zone or Multi-Focus Points: This setting is ideal for moving subjects. It’s harder to focus on a fast-moving subject using a single point, so multi-point focus helps by covering a larger area and tracking movement.
- Auto Focus Point Selection: In this mode, the camera automatically chooses the focus point. While this can be convenient, it doesn’t always result in the desired sharpness, especially when you want a specific area in focus.
For most of your shots, focus on using Single Focus for still subjects and Zone Focus for moving subjects.
3. Use the Appropriate Drive Mode
Drive mode determines how many photos your camera takes when you press the shutter button. The most common options include:
- Single Frame Mode: This takes one shot per shutter press. It’s the best choice for still subjects where you can take your time to adjust the settings and get the perfect shot.
- Continuous Low and High-Speed Modes: These modes are great for action shots, as they let you take multiple images in quick succession. They are especially useful for photographing sports or fast-moving subjects like pets or children.
Using Continuous High-Speed mode increases your chances of capturing the perfect moment, but for non-moving subjects, sticking to Single Frame Mode is best to avoid wasting memory and time.
4. Use a Large Aperture
A large aperture (like f/1.8) allows more light to enter your camera, which helps in low-light situations and makes it easier for your camera to focus. A wider aperture also results in a shallow depth of field, so you can isolate your subject from the background. This is particularly helpful in portraits or macro photography.
For best results in low light, opt for a lens with a wide aperture. Prime lenses like a 50mm f/1.8 are both affordable and highly effective for achieving sharp, well-lit photos.
5. Focus on Areas with High Contrast
To help your camera achieve focus, make sure the area you’re focusing on has sufficient contrast. Autofocus works best when there is a clear distinction between light and dark areas. For example, focus on an object with a defined edge or texture rather than a flat, featureless surface.
If you’re struggling to focus in low light or on a plain background, try using a focus target with contrasting areas to give your camera a better chance to lock focus before taking the shot.
6. Focus on the Eyes in Portraits
When photographing people, always prioritize focusing on the eyes. The eyes are the focal point of most portraits and are where viewers naturally look first. Even if the rest of the face falls slightly out of focus, as long as the eyes are sharp, your photo will still look crisp.
If the subject is slightly turned, focus on the eye that’s closest to the camera. This helps avoid creating an unnatural look where one eye is sharper than the other.
Additional Tips for Sharper Images
- Back Button Focus: This feature allows you to assign the focus function to a separate button on your camera, rather than the shutter button. This can be especially useful when photographing moving subjects or when you need to lock focus and recompose your shot without losing sharpness.
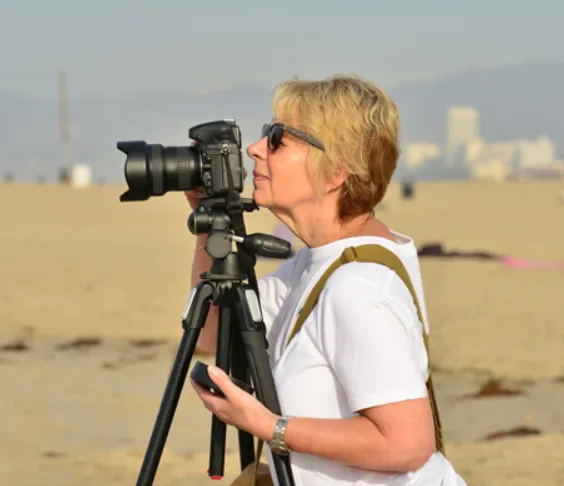
- Use a Tripod: If you’re photographing still subjects in low light, using a tripod helps eliminate camera shake, ensuring that every shot is sharp.
- Slow Down: Instead of shooting rapidly and hoping for a sharp shot, take your time to adjust your settings carefully and shoot deliberately.
By following these tips and mastering your camera settings, you’ll be able to take sharper, more professional-looking photos, no matter the situation.