Mastering White Balance for Better Photos: A Guide for Photographers
In photography, achieving accurate colors is essential to making your photos look natural and true to life. One of the key elements in achieving this is properly adjusting your camera’s white balance. In this post, we’ll explore the basics of white balance, how to adjust it, and how this simple setting can improve the overall look of your photos.
Understanding White Balance and Color Temperature
Light is made up of different color tones, and the color temperature of light refers to these variations. Think of how light splits through a prism or how you see a rainbow after rain—these are examples of the different color temperatures of light. Our eyes adjust naturally to changes in lighting, but cameras need help to capture the colors accurately. This is where white balance comes into play.
White balance helps your camera interpret the color of the light in any given scene so that whites appear truly white, and colors are balanced. If your image looks too warm (yellowish) or too cool (bluish), the white balance setting is likely off.
What is Color Temperature?
Color temperature is measured in Kelvin (K), and it describes the warmth or coolness of light. At the lower end of the scale, you’ll find warm colors like reds and oranges, while cooler colors like blue appear at the higher end. For example, a candle flame has a low color temperature and appears orange, while daylight is cooler and has a higher temperature. Understanding this scale helps you choose the correct white balance setting to match the lighting conditions.
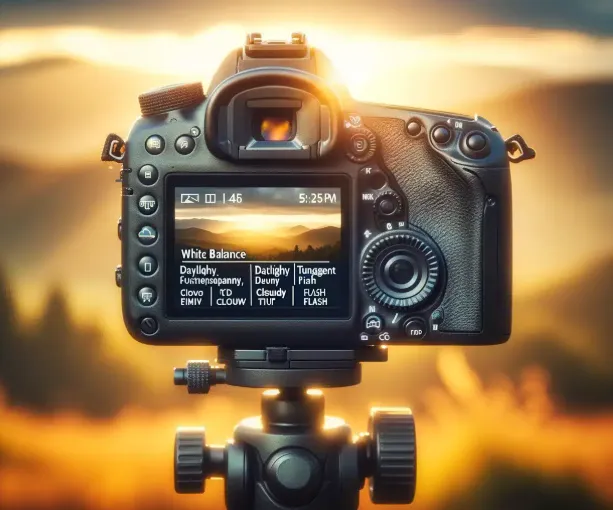
How to Adjust White Balance on Your Camera
Most digital cameras come with several white balance presets that can be selected based on the type of light you’re shooting in. Some common presets you might find on your camera include:
- Auto White Balance (AWB): The camera automatically adjusts to the scene’s lighting.
- Daylight/Sunlight: Ideal for shooting outdoors in bright sunlight.
- Shade: Useful when shooting in shaded areas to warm up the image.
- Cloudy: Slightly warmer than daylight, perfect for overcast days.
- Tungsten: Compensates for the warm light from incandescent bulbs, adding a blue tone.
- Fluorescent: Adjusts for the greenish light from fluorescent bulbs.
- Flash: Adjusts for the bright, white light from a flash.
- Custom/Kelvin: Manually set the color temperature using Kelvin values.
The default Auto White Balance (AWB) setting works well in many cases, but if you’re aiming for a specific mood or look, manually adjusting the white balance can yield more pleasing results.
Getting Off the Auto Settings
While AWB is convenient, it’s often better to manually select a white balance preset that matches your scene. This gives you more control over the final look of your image. By choosing the right white balance, you can ensure that your images accurately reflect the lighting conditions of the scene, whether you’re shooting indoors, outdoors, or in mixed lighting.
For example, if you’re shooting in a room with tungsten bulbs, the camera might add a blue tint to correct the orange glow. Similarly, if you’re in the shade, the camera will add warmth to counteract the cool light.
When to Use Auto White Balance
There are three specific situations where Auto White Balance (AWB) works particularly well:
- Mixed Lighting: When your scene has multiple light sources, such as a combination of daylight and tungsten light, AWB can balance the color temperature.
- Constantly Changing Lighting: If you’re shooting in changing light conditions, such as the sun coming in and out of clouds, AWB can adjust dynamically.
- Shooting JPG: When shooting JPG files (instead of RAW), AWB is generally a safer choice because it’s harder to adjust white balance later in post-processing with JPG files.
If you’re shooting in RAW, however, you have more flexibility and can adjust the white balance in post-production without losing quality.
Using White Balance Creatively
White balance isn’t just for accuracy—it can also be used creatively to change the mood of your photos. For instance:
- Sunrise or Sunset: If you want to enhance the vibrant colors of a sunrise or sunset, try using the Shade or Cloudy white balance setting. This will intensify the warm tones, making the scene look more colorful and dramatic.
- Winter Scenes: To make snowy landscapes feel colder, set the white balance to Daylight or even Tungsten. This can add a cool, crisp look to your photos.
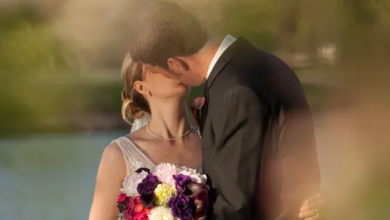
- Portraits: For more flattering skin tones, especially in bright sunlight, try using Cloudy or Shade settings. These presets warm up the image, giving your subjects a healthier, more natural appearance.
Advanced Control with Kelvin
If you want full control over your white balance, use the K (Kelvin) setting on your camera. This allows you to manually adjust the color temperature by dialing in a specific number of Kelvin degrees, giving you precise control over the warmth or coolness of your image. For example, you can add more warmth to a cold winter scene or cool down an image that looks too warm under artificial lighting.
White Balance in Post-Processing
Another significant advantage of shooting in RAW is that you can adjust the white balance during post-processing. In software like Lightroom, you can tweak the white balance slider to get the exact look you want, even if the setting was off during the shoot. This is much harder to achieve with JPG files, so if you often shoot in JPG, you may want to use AWB or a preset that fits your scene.
Final Thoughts
Mastering white balance is one of the easiest ways to instantly improve the color accuracy and mood of your photos. Whether you’re trying to correct the lighting or experimenting with creative effects, understanding how to control your camera’s white balance can elevate your photography. So, next time you’re out shooting, don’t rely solely on Auto White Balance—take control and make your images look exactly how you envision them.