4 Creative Ways to Enhance Your Blue Hour Photography
Blue hour is a magical time for photographers, yet it’s often overlooked. After golden hour fades, many pack up their gear and head home, unaware that the best part of the day is just beginning. Blue hour, with its low light and moody ambiance, presents endless creative opportunities. It’s the perfect time to experiment with new techniques and capture stunning images in a unique setting. Here are four tips to help you make the most of blue hour photography.
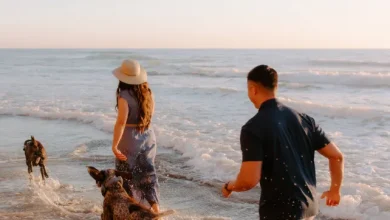
1. Incorporate a Light Source into Your Shots
One challenge of blue hour photography is dealing with shadows, especially when photographing people. A figure in a dark scene can easily blend into the background, making it hard to draw attention to them. The solution? Add a light source to your composition.
Headlamps, streetlights, campfires, or even car headlights can illuminate your subject and create a focal point in the darkness. Light sources not only help to highlight your subject but can also become an interesting compositional element. The contrast of light against the blue hour’s cool tones creates an engaging visual, making the subject stand out.
Headlamps are especially useful in hiking photography. A headlamp worn by your subject naturally draws attention to their face. You can also experiment with lens flare by directing the headlamp toward your camera. Depending on your aperture, the flare can range from a soft glow to a crisp starburst, adding a magical effect to your shots. Additionally, shining a headlamp on nearby surfaces or objects can highlight textures, adding depth to the image.
Campfires, on the other hand, provide warm, widespread light, contrasting beautifully with the cool blue of the surroundings. They also create a cozy, inviting atmosphere, perfect for capturing group shots or a serene moment around the fire.
2. Experiment with Light Painting
Light painting is a fun and creative technique that works wonderfully during blue hour. All you need is a flashlight or even the light from your phone. By moving the light source through your frame during a long exposure, you can create streaks of light that add an exciting element to your photo.
Blue hour is ideal for light painting because there’s enough ambient light to see details in the scene, while still allowing you to capture vibrant light trails. Start with a shutter speed of around five seconds and experiment with different movements to create unique effects.
To get the best results, try these tips:
- Wear dark clothing: This helps you blend into the shadows, ensuring that you remain invisible in the final image.
- Keep moving: The more you move, the less time your camera has to capture your silhouette, allowing you to stay “invisible” in the photo.
- Use a tripod: A tripod ensures your camera remains steady during the long exposure, making light painting much easier to execute.
By mastering these techniques, you can create dynamic, abstract images that make the most of the blue hour’s lighting.
3. Head to the Mountains for Stunning Views
Blue hour photography in the mountains offers incredible opportunities. The calm winds and still lakes create mirror-like reflections, while the soft light casts a magical glow on the peaks. If you’re fortunate, you might even witness “Alpenglow”—a beautiful pink or red glow that appears on mountain peaks after sunset. The combination of blue hour light and the vibrant hues of Alpenglow makes for breathtaking photos.
For the best experience, hike above the tree line to get expansive views of the landscape. The higher you go, the more dramatic your blue hour shots will be, with sweeping vistas and sharp, well-defined mountain ridges. Capturing both the soft blue tones and the vibrant colors of the sky during this time can add an extra layer of visual interest to your photos.
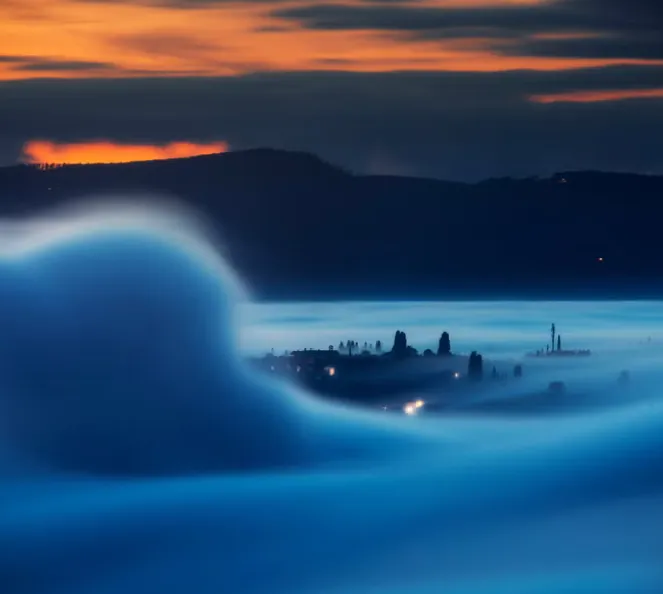
4. Utilize Long Exposures
Blue hour is the perfect time to experiment with long exposure photography. Even though it may seem dark, the available light during this time allows you to capture long exposures without needing any extra filters. This makes blue hour an excellent time for photographing scenes like waterfalls, lakes, or clouds.
A long exposure can turn a waterfall into a silky smooth flow or create streaks of clouds across the sky. Blue hour provides the ideal balance of light and exposure time to achieve these effects. The results are professional-looking images without the need for additional equipment like Neutral Density filters.
Start with a shutter speed of around 10 seconds to capture the ambient light and get a well-lit, vibrant image. If you’re photographing a waterfall or moving water, the longer exposure will create a smooth, ethereal effect that’s especially stunning during blue hour.
Conclusion
Blue hour is often a forgotten gem in the world of photography, but it’s the perfect time to experiment with creative techniques and capture stunning images. Whether you’re incorporating a light source, trying light painting, exploring the mountains for dramatic views, or practicing long exposures, blue hour provides endless opportunities to take your photography to the next level. With these tips, you’ll be ready to make the most of this magical time of day and add new dimensions to your images.